X-TPMS is not available anymore. We strongly advise against the use of TPMS valve caps on motorcycles with rubber valves.
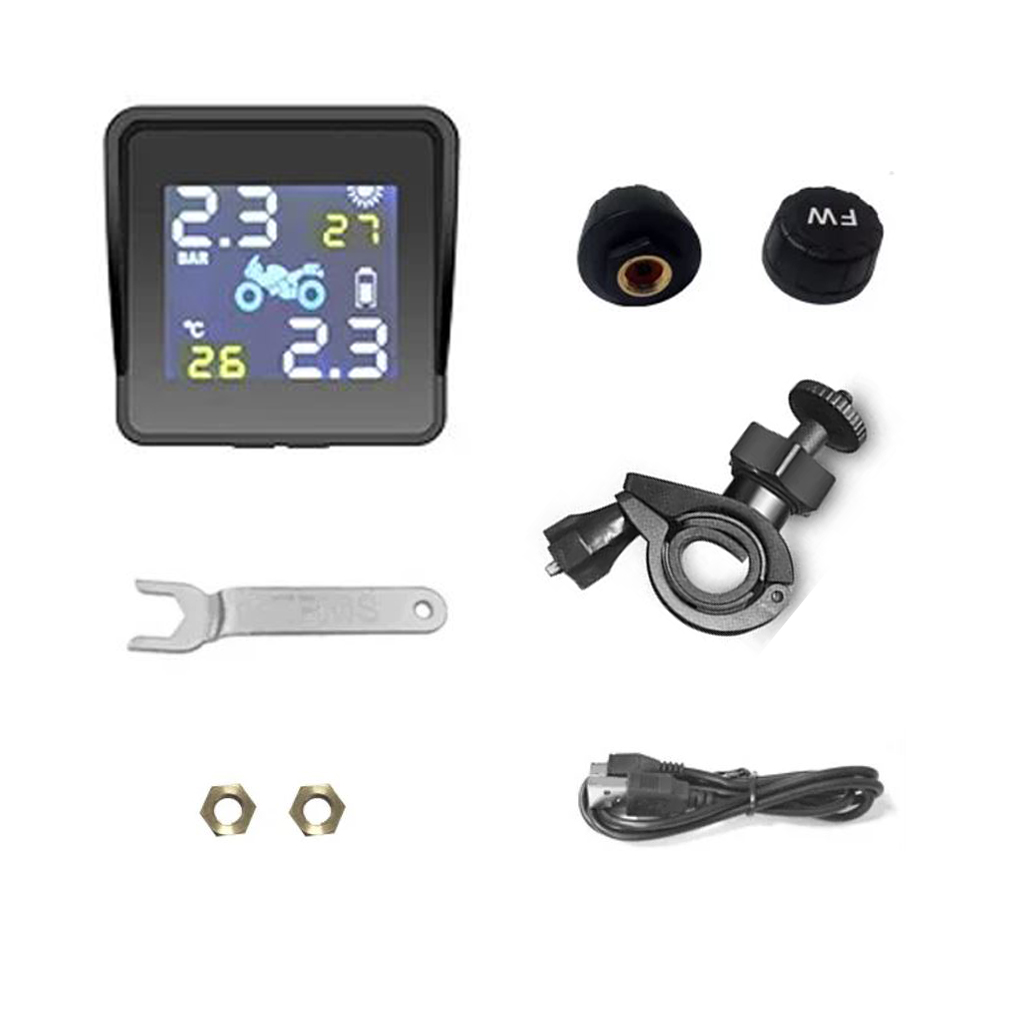
TPMS unit
Valve cap with sensors for (FW) front- and (RW) rear wheel
Spanner
Bracket with ball head
Anti-theft nuts
USB cable
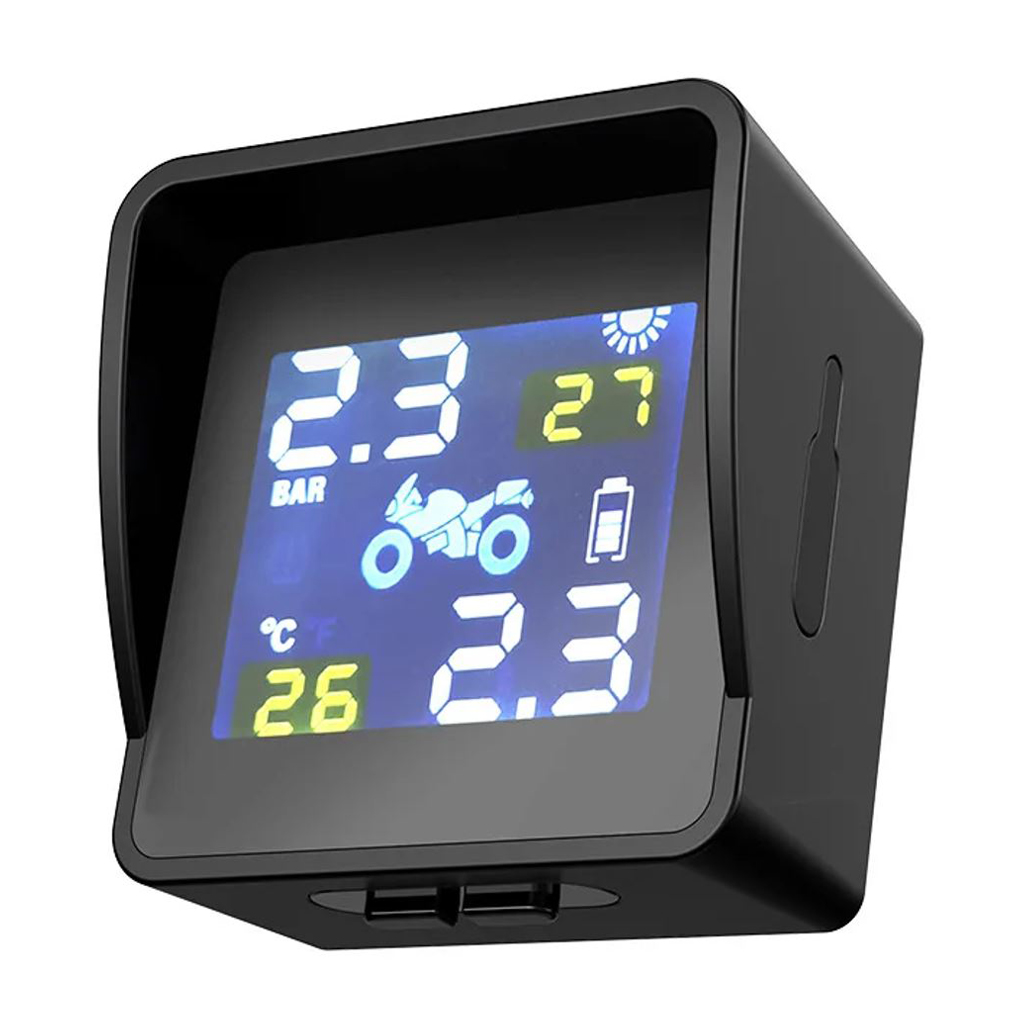
Start by charging the TPMS unit using the USB cable that you plug in at the right side of the unit. You can use any USB 5V mobile phone charger to charge the unit. (Net-adapter is not supplied)
Simply install the bracket on the handlebar by fasten the finger screw so that the bracket is firm and secure. The bracket has a ball head so you can adjust the angle on the TPMS unit.
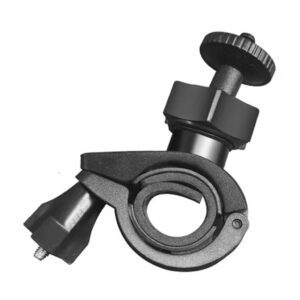
Then you mount the TPMS unit by installing the unit to the screw on top of the ball head and tighten the screw.
The TPMS unit will buzz and an icon will appear on the LCD screen if the tirepresure will get under a certain level and an alarm will also appear if the temperature is getting over a certain level. The levels can be fixed by pressing the two buttons on the bottom of the TPMS unit.
FW = Front wheel.
BW = Back wheel.
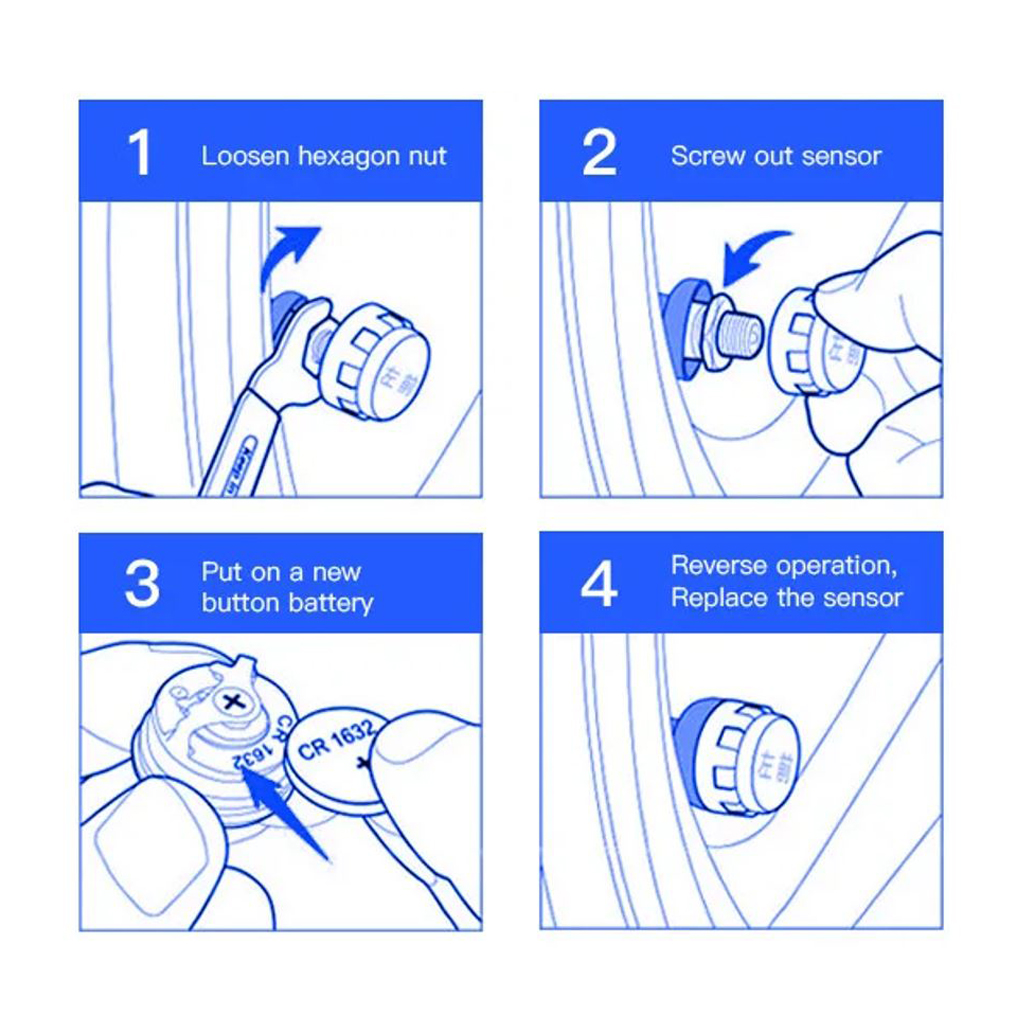
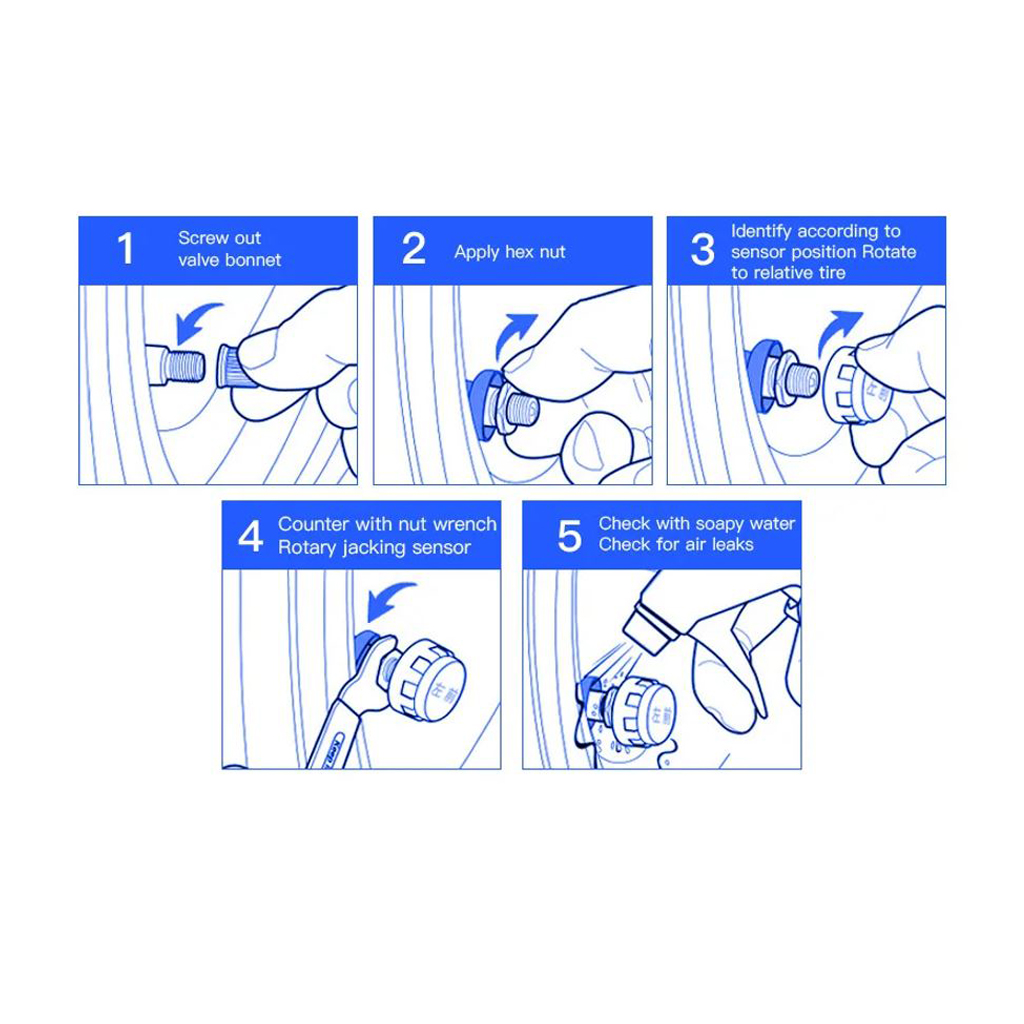
Turn the nut counter clockwise and tighten just a bit with the spanner. Now the cap is protected against theft, or at least not easy to dismantle. Put the spanner in your tool bag beneath your seat or rear seat. so that you always has it on your motorcycle.